Screenshots and History

I stumbled again with this old nice article by Alex Chan on taking screenshots as history preservation. I have a small screenshots collection of old machines of mine, dating back to 2000 and they always bring a smile to my face. I can vividly remember where I was and with whom, how life was back then, etc.

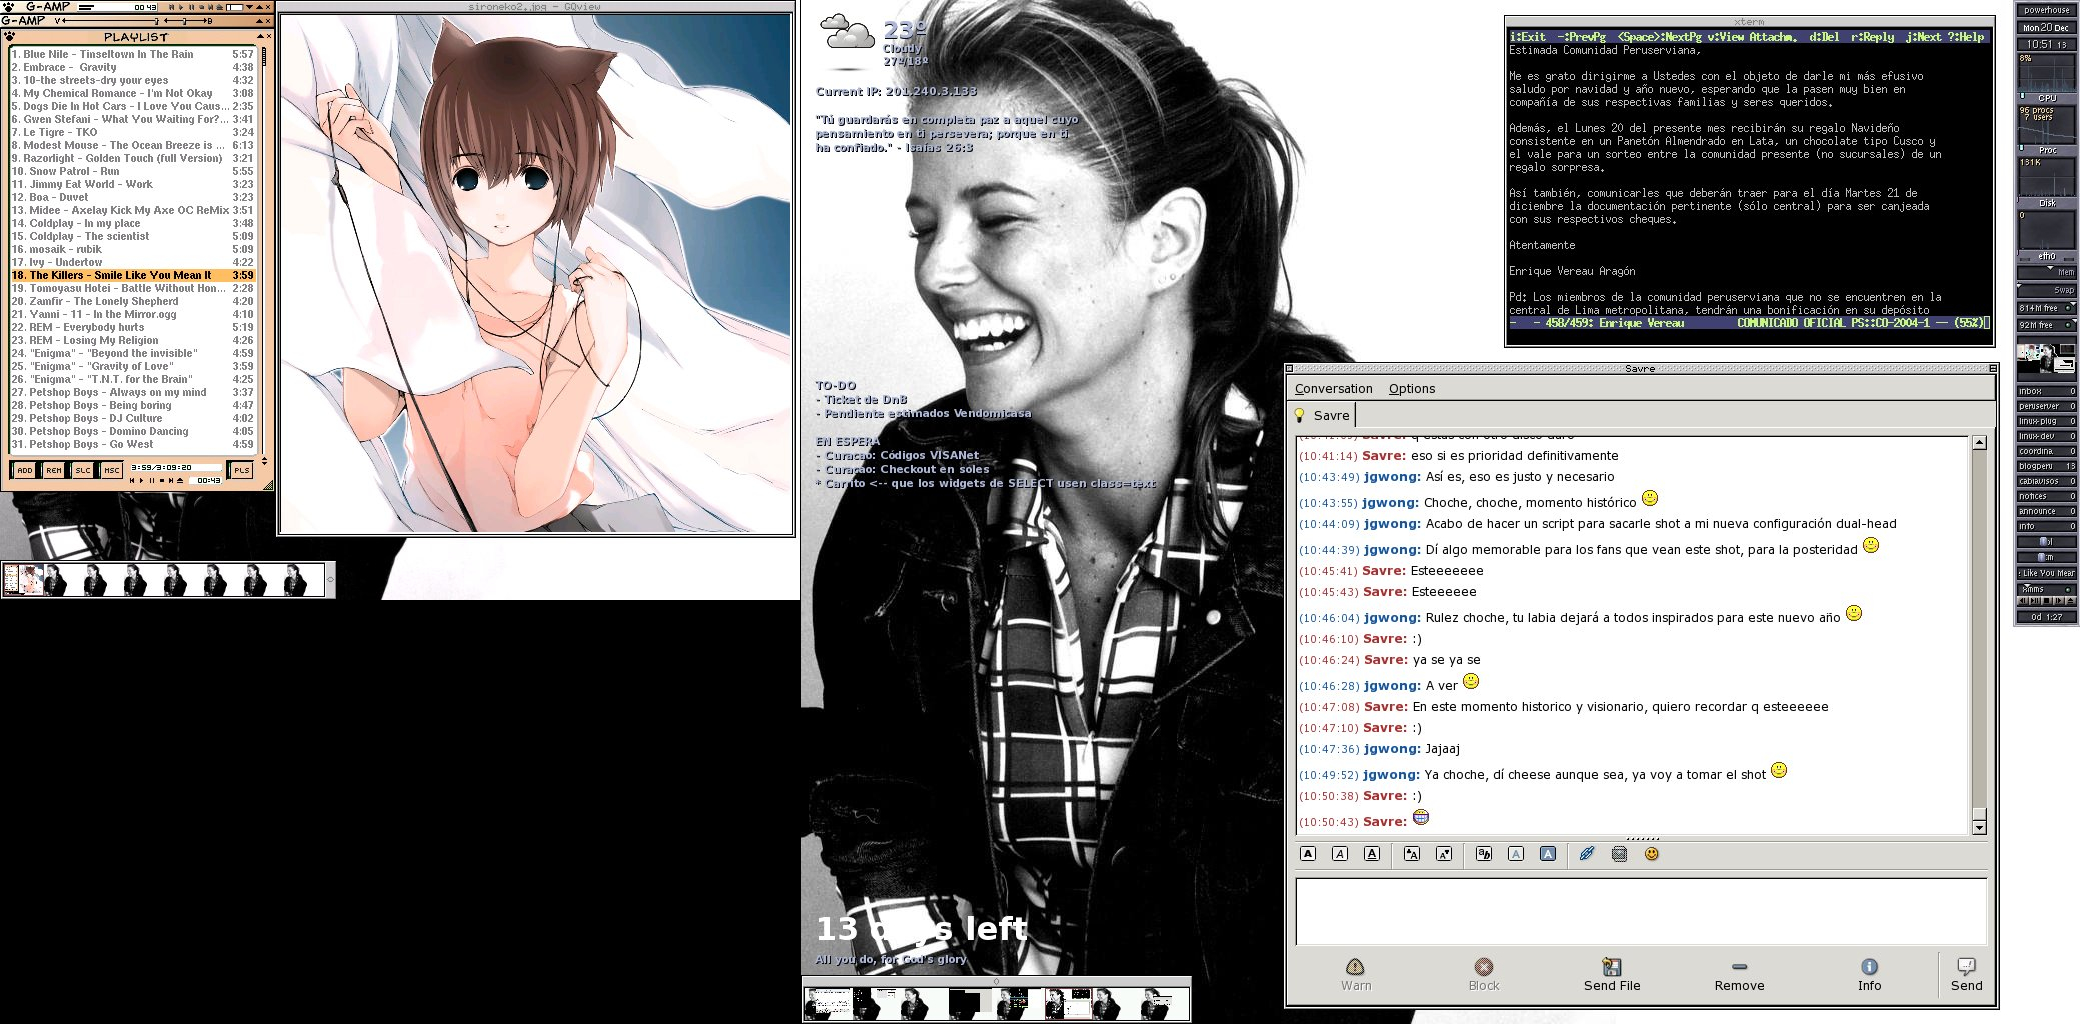
This one’s from December 2004. I had a two-monitors configuration which wasn’t common at the time, you needed two graphics cards and play with Xinerama to get it working. I just finished writing a script that captured and stitched each monitor’s screenshots into a single image, using ImageMagick:

I should do the same with Real Life. I should take more photos like I used to. While I enjoy artistic photography, composition and stuff, there’s also a place and value for casual snapshots, like the old days with point-and-shoot cameras. Nowadays, I always carry a camera with my smartphone, I have no excuse. Just snap without much planning. This is not about art but about history and logging.

We were there. We lived like this. Our kids looked like this. We dressed like this. Our house looked like this. Our pets looked like this. I looked like this. I have so few photos of myself; I’m always behind the camera.

Just capture things with a screenshot, with a photo; all its imperfections, mess and lack of glamour. History. Preserve it as it is.

Lock screen triggering twice on Xubuntu

After upgrading Jupiter’s Xubuntu to 22.04 (Jammy Jellyfish) on the holidays, I had this weird bug with XFCE where you unlocked and right away you got a different lock screen again, but the text boxes didn’t work and it didn’t respond to mouse clicks or anything. And it’s super hard to search for that kind of thing.

Long story short, disable XFCE’s Screensaver. That second lock screen comes from the screen saver, yep. Why does this happen is beyond me. And since we don’t use a screen saver on Jupiter (it’s the family machine), and I had other things to fix and adjust after the upgrade, I’m OK with this solution.

Trying xdotool and pyautogui

I tried xdotool and it’s pretty cool. I was automating setting up my Slack status. It finds the Slack window, focuses it, clicks here and there and — tah-dah! — my status is updated. It totally depends on things being in fixed places, but it works.

Then I tried pyautogui planning to port this script and see how it compares with xdotool, but I was surprised right from the start to discover pyautogui doesn’t have any feature to find or operate on windows. So I’ve decided to stick with xdotool and dive deeper. I might try pyautogui some other time.

One thing I liked about pyautogui is it’s «failsafe» — if you slam the mouse and move the cursor to any screen corner, pyautogui will stop running. This is a great feature. One automation of mine with xdotool didn’t quite work (the popup appeared too late) and suddenly xdotool was blindly doing stuff on the wrong places and I couldn’t stop it. No damage was done, but it was scary.

I totally needed something like pyautogui’s, but this required a higher-level language. I went with Ruby. My failsafe is the top or bottom edge of the screen. Before it executes any xdotool command it checks the mouse location and throws an exception. Works pretty well and I recurred to it when I made a mistake and the automation misbehaved.

Lesson learnt: automating the GUI is powerful, but also dangerous. Unlike a shell script, the GUI is an unpredictable environment and things can quickly derail. I like the way pyautogui’s documentation describes this:

Like the enchanted brooms from the Sorcerer’s Apprentice programmed to keep filling (and then overfilling) the bath with water, a bug in your program could make it go out of control. It’s hard to use the mouse to close a program if the mouse cursor is moving around on its own.

It’s a powerful, but double-edged sword. And lots of fun too! Automating the GUI is another dimension and a very useful skill to have.

GUI Automation on Linux

Curious to learn automating GUI stuff on Linux, that is, moving the mouse, clicking on buttons, pressing keys, etc.

I’m planning to learn two: xdotool and pyautogui. I like that you can give an image to pyautogui and it will find it on the screen and click on it. Pretty powerful stuff.

CLIP Studio Paint 1.13.1 on Linux

Installed CLIP Studio Paint 1.13.1 and the installation went without any problems with WINE Staging 7.22. It couldn’t connect to the internet for validating the license but its «offline» alternative validation worked.

But it’s not usable. CTRL+N and CTRL+Z didn’t work, I think it’s not catching those shortcuts. And my zoom in/out shortcuts work intermittently. My Wacom Intuos3 tablet worked flawlessly.

And it kept working at 70% CPU. So, not really usable. I was interested on the new features for the 3D models but looks like I’ll have to bite the bullet and learn Blender for real.

Semana 29, 2021: «¡Silencio, Bruno!»

Domingo vimos Luca con los chicos. El mensaje en la noche fue un mensaje especial a cargo de Don Rodolfo.

Lunes fue un día ajetreado. Martes, Miércoles y Jueves Michelle tuvo exámenes provistos por la Dirección Regional de Educación.

Hice mil intentos y no se pudo: Adobe XD no funciona en Linux con Wine. Tampoco pude instalarlo en Prime (mi Macbook Pro 2011) porque requiere Mac OS 10.14 y Prime ya no lo soporta. Tengo dos alternativas: intentar una vez más correr Windows 10 en VirtualBox o (sigh) instalar Windows 10 en Jupiter. El problema es que necesitaría una licencia y no hay presupuesto para eso.

Ese artículo es muy bueno: The unreasonable effectiveness of just showing up everyday. Es un ejemplo en la vida real de The Compund Effect, un libro que también se los recomiendo leer.

Ando un tanto preocupado últimamente y buscando con qué distraerme. Pensé en volver a dibujar en mi Journal Comic y luego en hacer cositas con Blender, pero siento que estoy perdiendo el tiempo.

No he hecho buen progreso en mi nueva sección de Articles. Es decir, ya está el diseño, ahora falta lo más importante: escribir el contenido.

Visto:

  • Luca
  • Tom Clancy’s Jack Ryan (S01E01)

Oído:

  • Ace of Base – Young and Proud
  • 4mat – The Edge of the Wheel
  • The Blue Nile – Broken Loves
  • Kraftwerk – Showroom Dummies

Sobre flojera e invitaciones de Zoom

Una de las «virtudes» de todo buen programador es la flojera. Y es que los programadores, al encontrarse con una tarea repetitiva o lenta, tienden a preguntarse: «¿Cómo podría hacer esto más automático/rápido/eficiente/barato/divertido?» Tenemos muy poca tolerancia a la ineficiencia.

Se los ilustro con un caso mío reciente.

Para las reuniones de mi iglesia usamos Zoom. Yo me encargo de agendar y enviar las invitaciones para cada reunión (no usamos reuniones recurrentes).

Zoom genera un texto que puedes copiar y pegar para compartir con otros todos los datos pertinentes de la reunión, así:

Mi cuenta de Zoom está en inglés, si quisiera generarla en español tendría que cambiar el lenguaje a toda mi cuenta. Por otro lado, hay ciertos detalles, como la presentación de la fecha y la hora que prefiero cambiar. Como esto es algo que hago 5 veces o más a la semana, decidí poner patas a la obra.

Siendo flojo, ni siquiera miré la API de Zoom. Zoom te permite copiar con un solo click el texto de la invitación. Mi estrategia fue trabajar sobre la base de tal texto.

Programé un script que extrae los datos pertinentes (regexp magic!) y escribe a STDOUT la invitación en español y con el formato que quiero.

Siguiendo la filosofía Unix («Expect the output of every program to become the input to another») hice un segundo script que lee el portapapeles, lo envía al script «traductor» y reescribe el portapapeles con la nueva invitación.

Mi operación final es:

  • Copiar la invitación desde Zoom al portapapeles (un click).
  • Ejecutar mi script.
  • Pegar la invitación al grupo de WhatsApp de mi iglesia.

Sé que podría automatizarse todavía más, pero me da flojera.

Extrayendo un rango de texto de un fichero grande

Necesitaba extraer un rango de líneas de un fichero de texto de varios gigabytes. Hacerlo a través de un editor de texto era impráctico. Mi solución fue usar sed:

sed -n 'INICIO,FINp;(FIN+1)q' FICHERO > NUEVO_FICHERO

Por ejemplo, para extraer desde la línea 10 hasta la línea 500 del fichero gigante.txt y guardarlo en extracto.txt:

sed -n '10,500p;501q' gigante.txt > extracto.txt